Understanding Content Security Policy (CSP) and Its Importance
In today's digital landscape, ensuring the security of web applications is more critical than ever. With cyber threats continuously evolving, developers and administrators must implement robust security measures to protect their applications and user data. One such measure is the Content Security Policy (CSP). In this blog post, we'll dive into what CSP is, why it's essential, and how you can easily manage CSP headers for Xperience by Kentico.
What is Content Security Policy?
Content Security Policy is a security feature designed to prevent a variety of attacks, including Cross-Site Scripting (XSS), clickjacking, and other code injection attacks. CSP provides an additional layer of security by allowing web developers to control the resources that a web page can load.
By defining a set of rules in the form of CSP headers, developers can specify which sources of content are considered safe. These rules can restrict the execution of scripts, loading of images, styles, and other resources from untrusted sources. This means that even if an attacker manages to inject malicious code into a web page, the browser will block the execution of such code if it violates the defined CSP rules.
For more information on Content Security Policy (CSP) itself, you can visit the MDN Web Docs.
Key CSP Directives
The rules that make up a CSP header are often referred to as directives. Here are the key CSP directives you would ideally configure on your website when needed:
default-src: Specifies the default policy for loading content such as JavaScript, images, CSS, fonts, AJAX requests, frames, HTML5 media, and web workers.
script-src: Defines the valid sources for JavaScript.
style-src: Specifies the sources for stylesheets.
img-src: Controls the sources from which images can be loaded.
connect-src: Limits the origins that you can connect to (via XHR, WebSockets, and EventSource).
Example CSP Headers
A basic example of a CSP header that I am currently using for this blog website is:
This ensures that all content is loaded only from my own website, but with an exception of YouTube video embeds which I am explicitly allowing in the header for frame-src.
Another example below is allowing Google APIs and Google Fonts to be used on the website.
Once you have implemented CSP headers on your website, it is crucial to validate it, this will help make sure that it is working as expected and does not unintentionally block required content. You can try using CSP Validator, or Google's CSP Evaluator.
Over the past few months, I have developed an open-source custom module, available on GitHub and distributed through NuGet, to simplify the implementation of CSP on your Xperience by Kentico channels.
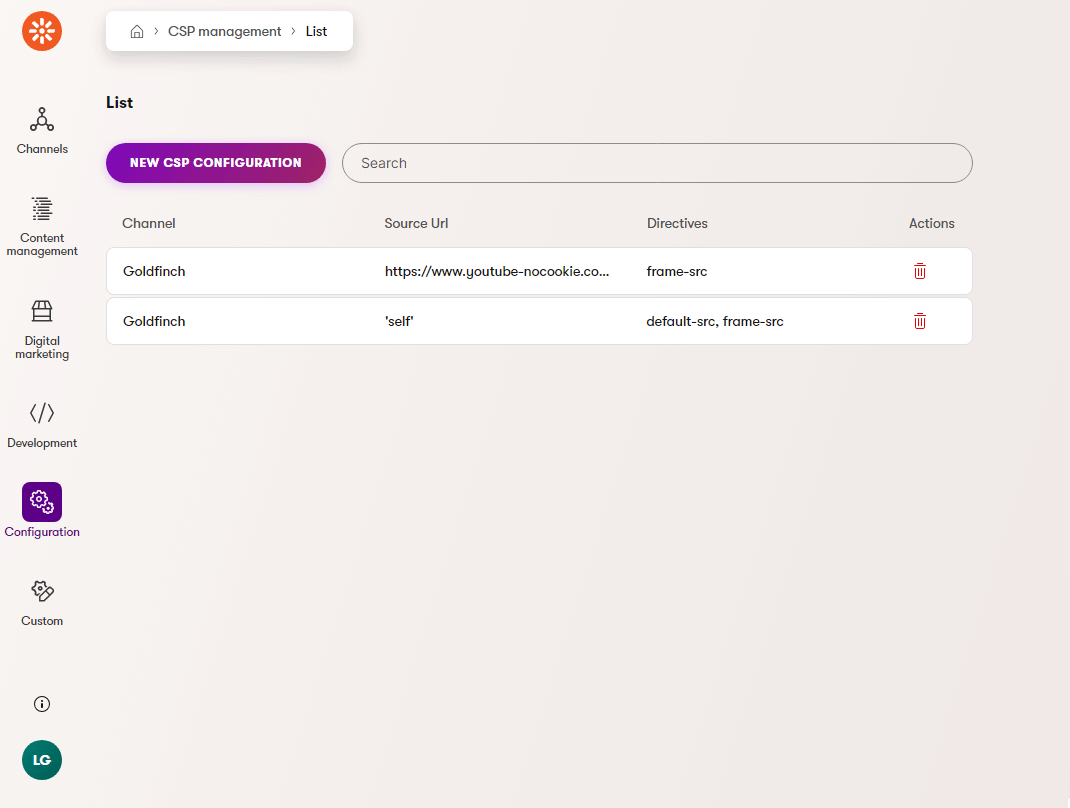
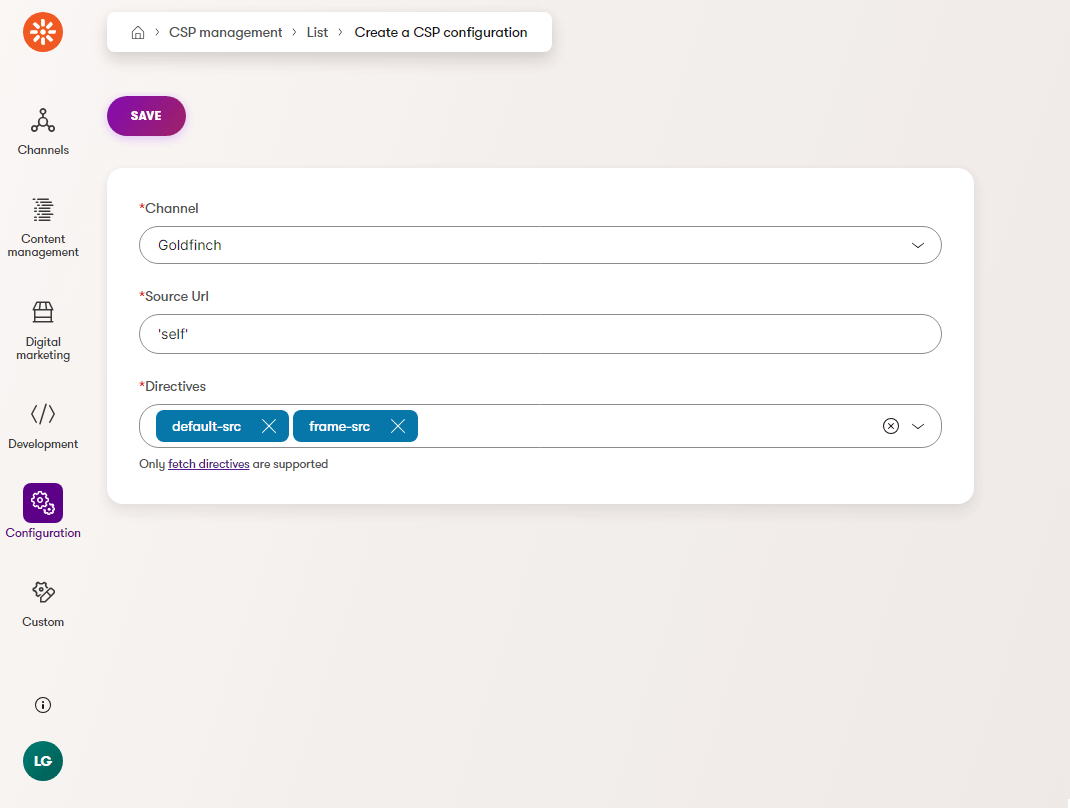
User-Friendly Interface: The module provides a user interface for administrators to easily configure and manage CSP headers without needing deep technical knowledge.
Flexible Configuration: Administrators can define and adjust CSP rules based on the specific needs of their web channels. You can choose the channel it applies to, and includes a toggle to disable individual CSP rules if you need to quickly action it.
Enhanced Security: By using this module, you can ensure that your web applications adhere to stringent security policies, protecting them from various web vulnerabilities. The module supports nonce-based CSP, allowing for dynamic script management and enhanced security for your web applications.
How to Get Started
To start using this module on your Xperience by Kentico installation, follow these steps:
1) Install the NuGet package
dotnet add package XperienceCommunity.CSP
2) Register the CSP management services
// Program.cs

var builder = WebApplication.CreateBuilder(args);

builder.Services.AddKentico();

// ...

builder.Services.AddXperienceCommunityCspManagement();
3) Register the CSP management middleware
 var app = builder.Build();

 app.UseKentico();

 // ...

 app.UseXperienceCommunityCspManagement();
That's it, launch your website and the module should be installed ready to go! Once you've configured your CSP headers, load a page on the website and check the headers in your browser console.
For more details and to access the source code, visit the GitHub page.
I welcome new feature requests and community contributions to help make this module even better.
Conclusion
Implementing CSP is crucial for protecting your web applications from various attacks. By using this new open-source module, you can simplify the process and ensure your applications are secure.